Saturday, January 13, 2024 | Mid-Cities Pest Control
Happy New Year from all of us at The Bug Dude! We hope that your holidays were joyous, and your new year is starting out wonderfully!
The confetti has settled, the fireworks have all gone off, the champagne has been consumed, and 2024 has begun. If you’re like a lot of people, one of the first things you did after all the celebrations had concluded was to let out a sigh of relief that all the stress of the holiday travels was over for another 11 months. But for many animals, the biggest travel times of the year are just approaching. And while fireworks in the sky are an enchanting sight, nothing can compare with the majesty nature has to offer when animals take to the skies in mass migrations.
Whether the migration is centered around food and water, finding a mate, or giving birth, there are some amazing animals performing astounding feats every year in North America. So to ring in the new year, instead of talking about the issues you can encounter when insects and wildlife invade your home, we’re going to look at some of the grandeur Mother Earth has to offer.
3,000 Miles
One of the most majestic and breathtaking animal migrations in North America is performed by something with only a 4-inch wingspan: the monarch butterfly. These beautiful insects will fly a distance of 3,000 miles during their migration from Canada to Mexico (though some will overwinter in the U.S. in Florida or California). Even more amazing than the fact that these insects can make such a long journey is how they do it. The journey south is completed by a single long-lived generation of monarch butterflies, but the journey north is completed by multiple (3 to 5) generations of the butterfly!
If you ever get the chance to visit a spot along the migratory path of these butterflies, you won’t regret taking the time to admire these beautiful creatures in flight or simply resting in droves on trees. I’ve had the chance to experience it firsthand and it is every bit as magical and fascinating as it sounds.
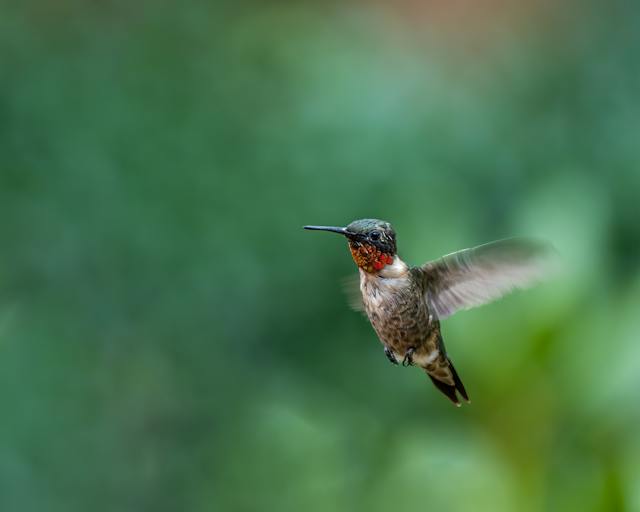
7 Grams
Weighing in at only 7 grams, another 3,000-mile North American migratory animal to marvel over is the ruby-throated hummingbird. These tiny birds, only 3.5 inches tall, not only traverse the distance between Canada and Central America, but they are capable of flying completely across the Gulf of Mexico, a 500-mile trip that they have to make in one 18-22 hour nonstop flight! On shore, these little birds cover an average of 20 miles per day on their trek; that’s better than most human thru-hikers can manage!
29,000 Feet
Perhaps the most easily recognizable migration in North America is that of the Canada goose. Unlike the smaller animals on this list, it’s difficult not to notice the sky filled with v-shaped formations of birds measuring 2-3.5 feet long and with a wingspan of 4-6 feet. But in case you weren’t looking up at the time, their distinctive honking will quickly alert you to their presence. And while you marvel at them flying overhead, consider that they have been known to reach an altitude of 29,000 feet (about the height of Mount Everest) during their journeys and can cover 1,500 miles in a single day!
500,000 Birds
If you’re looking to set eyes on hundreds of thousands of birds preparing for their long migratory journey, look no further than the sandhill crane. These graceful, long-legged birds stand around 4 feet tall and spend most of their lives in freshwater wetlands. Every year they make the trek from Texas, California, or Florida all the way up to their breeding grounds in Canada, Alaska, and Siberia. What’s particularly unique about their migration is that between March and April around 80% of these cranes (over 500,000 birds) settle in a 75-mile stretch along the Platte River in Nebraska in order to fatten up and gain the reserves they need for their journey. During their journey, they can fly up to 400 miles in a single day.
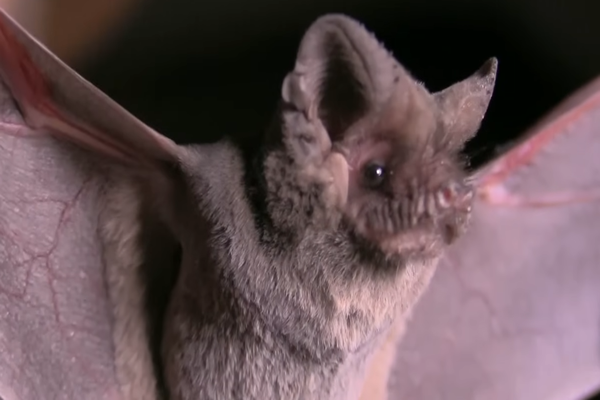
60 MPH
When you think of the great migrations of the world, you probably first think of a variety of birds, then maybe animals like wildebeest, eventually you would get to ocean-dwellers and insects, but would you ever think of the migration of bats? While not all bats migrate or migrate any significant distance, the Mexican free-tailed bat completes an annual migration from Texas to Mexico. While not traveling the longest distance, these bats not only can fly up to 60 mph, but they also come in droves. Every year at least 100 million female bats make the trip up to Texas to give birth!
45 Years
While all of the migrations discussed above are spectacular to witness, there is also an intrinsic beauty to be found in staying in one place, and we here at The Bug Dude are happy to have called the Mid-Cities area our home since 1979. That’s right, we are celebrating our 45th anniversary this year! So to help us celebrate, let’s look at a few highlights from the year Mid-Cities Pest Control began.
Oscar Winners: Jon Voight, Christopher Walken, Jane Fonda, and Maggie Smith
Best Movie Oscar Winner: The Deer Hunter
Top Grossing Movie:Superman
Also in the Top 5: The Amityville Horror, Rocky II, Star Trek: The Motion Picture, and Alien
Top-rated U.S. TV shows: 60 Minutes, Three’s Company
Also in the Top 10: M*A*S*H, Dallas, The Jeffersons, and The Dukes of Hazzard
Best Musical Tony Winner: Sweeney Todd
#1 on the Billboard Hot 100: “My Sharona” by The Knack.
Also in the Top 10: “I Will Survive” by Gloria Gaynor & “Y.M.C.A.” by Village People
Sports: the Pittsburgh Steelers won Super Bowl XIII, the Seattle Supersonics won the NBA finals, the Montreal Canadiens won the Stanley Cup, and the Pittsburgh Pirates won the World Series
Noteworthy: the 1979 NCAA Championship still has the highest Nielsen rating for any U.S. basketball game (college or pro); the game was between Michigan State (with Magic Johnson) and Indiana State (with Larry Bird).
Historic Events: the Three Mile Island accident occurred, the Iranian hostage crisis began, and NASA’s Skylab fell to Earth
Technology: the Sony Walkman and the Black and Decker Dustbuster were introduced
Minimum Wage: $2.90 per hour
Price of Gas: $0.86 per gallon
Most Popular Car: Oldsmobile Cutlass
Average House Price: $62,900
DFW Population: 2,416,000
So as we look back at the 4.5 decades behind us and look forward to this bright and shiny new year, we would like to thank everyone who has contributed to the success of The Bug Dude and wish all of our clients (and future clients) a healthy, wealthy, and wise New Year!
Author Bio: Alissa Breach has been gaining knowledge and experience around pest control concerns over the last 14 years while working for Mid-Cities Pest Control. She has a creative writing BA from UW-Madison and is always pursuing new and interesting writing projects.
Friday, December 15, 2023 | Mid-Cities Pest Control
Christmas trees are an integral part of most Christmas celebrations; the family gathers together to listen to Christmas carols while they adorn the evergreen with garland, lights, and ornaments. Whether you cut down your own tree, buy one from a Christmas tree lot, use an artificial one, or simply decorate the one growing in your yard, you’re sure to enjoy the beauty this wondrous tree provides. But what do you really know about it? Keep reading to find out how the Christmas tree tradition started and what surprises could be hiding in that beloved tree.
When Did the Christmas Tree Tradition Start?
Winter celebrations involving evergreens are much older than you think and in fact predate Christianity! In the Northern Hemisphere, these celebrations generally centered around the winter solstice (which falls on December 21 or 22 and marks the longest night of the year). Early Romans celebrated the solstice by decorating their homes and temples with evergreen boughs in honor of Saturn, the god of agriculture, as the solstice marked the midway point in winter and thus the nearing of spring. Evergreen boughs were also used by the Druids (the priests of the ancient Celts) as temple decorations and were representative of everlasting life. Though the Vikings didn’t use evergreen boughs, they did honor mistletoe for its role in the story of one of the most beloved Norse gods, Baldur. Even Christians in England in the 15th and 16th centuries used the evergreens holly and ivy as a common winter holiday decoration for churches and homes.
The Christmas tree tradition that we now so fully embrace and enjoy began in Germany, though the exact origins aren’t clear. Perhaps the earliest documented example of an evergreen tree being used in a Christmas celebration goes back to 1419 when a guild in Freiburg used a decorated tree to represent the tree of knowledge in their “Paradise Play” that was performed on Christmas Eve, according to TIME. By the 16th century, it’s recorded that Christians had decorated trees in their homes in Germany, and it’s believed that the famous Protestant reformer, Martin Luther, was the first to add lighted candles to an evergreen tree. The term Weihnachtsbaum (German for “Christmas tree”) was in use by the 17th century, the same time when the oldest known Christmas tree market existed in Strasbourg in Alsace.
How Did Christmas Trees Become Popular in the U.S.?
It would be another 2 centuries, until the late 19th and early 20th century, before most Americans would embrace the Christmas tree tradition. Up until the 1840s, most Americans (other than German immigrants) still viewed Christmas trees as pagan symbols, a clear vestige of America’s early Puritan beliefs. These Puritan beliefs also led Massachusetts in 1659 to outlaw any observance of December 25th in order to maintain strict order and keep the day free from any potential pagan influence. But as German and Irish immigrants flowed into the U.S., the sternness of the Puritan legacy began to fade, allowing a pivotal moment to happen in the mid-1800s. In 1848 an illustration of Queen Victoria, Prince Albert, and their children celebrating around a Christmas tree was published in the Illustrated London News; since this royal family was very popular, what they did became immediately fashionable both in Britain and in East Coast American Society. Less than 50 years later, Christmas ornaments were being imported from Germany and the Christmas tree tradition was spreading across the United States. About another 40 years later, in 1931, Rockefeller Center hosted its first Christmas tree.
Can Christmas Trees Have Bugs on Them?
Whether you’re talking about the real Christmas tree that you are planning on putting on display inside your home or about the evergreen tree that adorns your yard, the same answer applies: yes. Though you are much more likely to contend with a pest problem on the living tree than on the cut one, it’s definitely possible to bring a bevy of pests into your house along with that beautiful Christmas tree. Keep reading for the types of pests you are likely to encounter.
What Bugs Are Found on Christmas Trees?
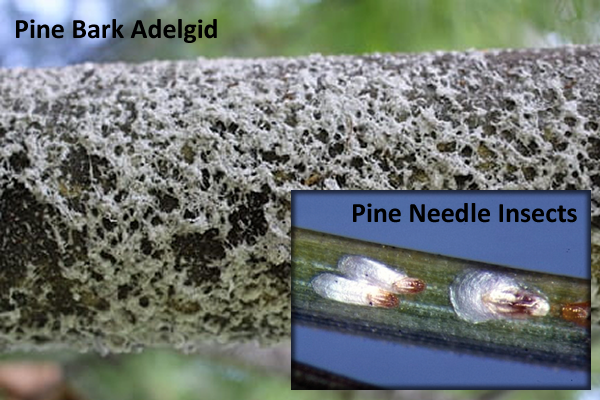
Adelgids – If your tree looks like it has white “flocking” on its needles, twigs, or bark, you may have an issue with adelgids. These insects are tiny, sedentary, and secrete white cottony wax filaments around their bodies. Though they might not look much like the insects we are most familiar with, they pack a punch and can easily kill a tree.
Aphids – For an overview of aphids, see our article here. Generally, these tiny insects are host-specific and will only feed on the type of tree you bought for Christmas, so won’t likely spread to other trees or houseplants. Interestingly, the giant conifer aphid can get up to 1/8” long and is one of the largest aphids in North America. Despite being tiny, they can cause real damage to leaves, shoots, and buds.
Bagworms – These insects are most recognizable for the tough silken case they build to live in; this case (or bag) can be up to 2 inches long and 1/2 inch wide and is strengthened with intermixed leaves, twigs, and bark. The mature bagworm caterpillars can be up to 1 inch long and will emerge as an adult that either looks like a black moth (male) or like a yellowish-white maggot (female). They are also voracious eaters of leaves and can completely strip the foliage off a tree if not treated.
Bark Beetles – The larval stage of these insects will bore into a stressed tree, creating a fine sawdust and leaving behind small holes; they will then feed on the tree, potentially killing it in the process. Adult bark beetles are small and cylindrical in shape and will eventually emerge from the tree, though they will still feast on it. Fortunately, they are not a threat to the furniture or structural wood in your home.
Bark Lice (psocids) – Unlike the similarly named bark beetles, bark lice do not actually feed on the tree itself, instead they feed on the materials that accumulate on the tree’s bark and leaves, such as pollen, mold, fungus, and even dead insects. They are small, soft-bodied insects that generally have wings and are either gray or brown.
Mites – There are a variety of mites that can inhabit an evergreen tree or any nests that are built in that tree. Mites are generally tiny and light-colored and are difficult to detect. On an indoor tree, they don’t pose much risk, but on living trees, they have the potential to do a lot of damage.
Praying Mantises – Though praying is likely part of your Christmas celebration, you probably weren’t looking to include this pest in the tradition. You almost certainly have an image of the adult praying mantis in your head, but did you know that they produce brown, frothy-looking egg masses that they attach to plants and trees? When these egg masses hatch, dozens of baby mantises will emerge! Fortunately, these pests are not dangerous to the tree itself, so if you see one of these masses on a tree in your yard you don’t have to fret. However, if you don’t want a deluge of mantises in your home, be sure to remove the egg masses before you bring your Christmas tree indoors.
Scale Insects – Much like adelgids, scale insects are sedentary and generally have a waxy covering. The exception to this is the youngest stage of scale insects, which are called crawlers; aptly named because they do exactly that. They are extremely small, but when found in large numbers, they can be quite distressing to behold. Even more distressing, however, is the damage scale insects can do to living trees, including stunting growth, discoloration, defoliation, and dead branches.
Spiders – Generally speaking, the spiders found on Christmas trees are harmless and are not well-adapted to living indoors. However, if you see a spider that you think could be harmful (brown recluse, black widow, etc.) or if you have an abundance of spiders in your home, call The Bug Dude as soon as possible.
Are Christmas Tree Bugs Harmful?
The spiders and insects found on Christmas trees that have been cut down and placed inside your home for the holiday are generally harmless, though they are definitely an unwelcome addition to your Christmas festivities! The biggest problem these bugs pose is that they take a beautiful part of your Christmas celebration and can make it frustrating, scary, or just plain gross. There is one exception, however, that can affect pets (if you have a bird as a pet) and bite humans, causing severe itching: bird mites. These pests cannot survive on a human host so are unlikely to cause a long-term infestation, and they are not known to transmit any diseases to people, but they would make for a very unhappy Christmas surprise.
The damage that evergreen tree pests can inflict on living trees in your yard can range widely. This damage could simply be an aesthetic blight, a deformation, stunted growth, or even worse, it could kill the tree. That’s why if you think you have a pest problem on your living Christmas tree, you need to call The Bug Dude at 817-354-5350 as quickly as possible to make sure you get to enjoy that beautiful tree for years to come.
Can You Prevent Christmas Tree Bugs?
There are a few tricks to keeping bugs from hitching a ride into your home this holiday via your real Christmas tree:
Before you buy the tree or cut it down yourself, make sure to inspect it with a bright flashlight; keep a lookout for any signs of the pests listed above and if you see those signs, move on to another tree.
If the tree you want has a bird nest in it, remove the nest before you pack it up to go home with you.
If you notice any praying mantis egg sacks and decide you want that tree anyway, simply remove the egg sacks and leave them outdoors.
Utilize the mechanical tree shaker at the tree lot where you buy your tree or manually give it a good shake if you cut down your own tree before you prep it for transport home.
When you get to your house, inspect the tree again for any signs of pests or any bird nests you may have missed, and remove them if possible. If you discover the tree is full of bugs, consider going back to the tree lot and exchanging it.
Shake the tree one more time before you bring it inside.
If you cut down the tree yourself, consider sprinkling some food-grade diatomaceous earth on it and leaving it on your porch or in your garage for about 48 hours before you bring it inside. This is a natural way to help eliminate potential pests. Be sure to shake the residue off the tree before you bring it inside.
Do not spray your indoor tree with pesticides as some can cause flammability risks.
For outdoor, living, evergreen trees, call The Bug Dude at 817-354-5350 to talk to an expert about your preventative treatment options.
What to do if Your Christmas Tree Has Bugs?
If you notice a few bugs emerging from your indoor Christmas tree, don’t overly stress. The majority of these pests are not suited to living inside your home and will quickly perish. For these few pests, simply vacuum them up as you see them. However, if you notice an infestation of pests or if they persist for more than a few days, call The Bug Dude at 817-354-5350 to get an expert technician out to identify the pest and get it treated before it can ruin your magical Christmastime.
Now, if you notice signs of any of the above pests on your outdoor, living, evergreen trees, make sure you call The Bug Dude immediately so you don’t risk the issue spreading and destroying that beautiful symbol of Christmas you cherish in your yard.
Christmas is a time to surprise your loved ones with gifts that show them how much they are loved and thought of. And while those surprises are part of the joy of the season, not all surprises are welcome. So if any pests try to crash your Christmas festivities, give The Bug Dude a call at 817-354-5350 and let us help get you back to a time of merriment, joy, and peace.
Author Bio: Alissa Breach has been gaining knowledge and experience around pest control concerns over the last 14 years while working for Mid-Cities Pest Control. She has a creative writing BA from UW-Madison and is always pursuing new and interesting writing projects.
Thursday, November 16, 2023 | Mid-Cities Pest Control
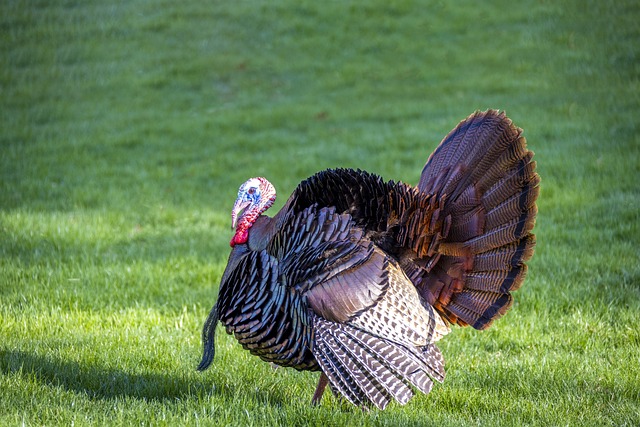
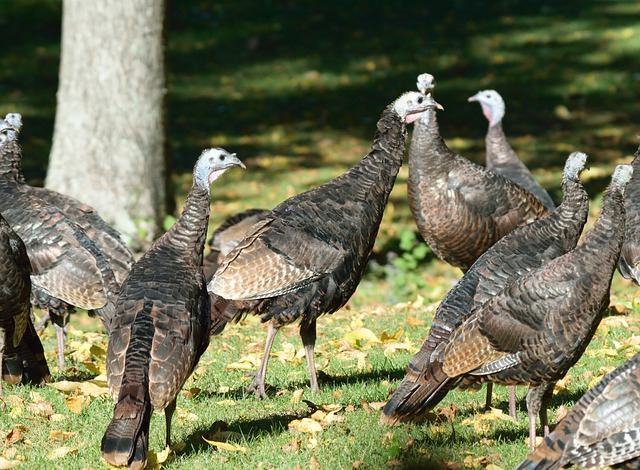
Thanksgiving is nearly here. That means it’s time to put up some harvest decorations, get ready for a big family gathering, and start cooking. While you might argue that a Thanksgiving meal isn’t complete without stuffing, a pumpkin pie, or cranberry sauce, you would almost certainly say that it’s not a true Thanksgiving meal without the main dish: turkey. But even if you don’t plan on eating any turkey this holiday, this indigenous bird is an absolutely iconic part of the season. Whether it’s a simple turkey hand drawing or a full turkey costume to wear at this year’s Turkey Trot, there is sure to be some sort of turkey imagery adorning your Thanksgiving celebration. But what do you really know about turkeys? Keep reading for the top 15 surprising turkey facts.
Turkeys Can Run and Fly Fast
Wild turkeys can run up to 25 miles per hour, that’s 1.65 miles per hour faster than Usain Bolt’s record-setting sprint! And they are even faster when they fly (and yes, wild turkeys most certainly can fly), clocking up to 55 miles per hour in short bursts. In fact, a wild turkey can travel several square miles in a day. Good luck trying to catch one of these birds for your Thanksgiving feast!
Turkeys Sleep in Trees
You might not expect a bird as large as a turkey to be hanging out in a tree, but that’s exactly where you’ll find them when it’s time to sleep. When dusk hits, these big birds fly up to high branches and roost for the night, only flying down again when dawn breaks. They spend their nights in trees to protect themselves from predators, especially since they don’t have very good night vision.
A Turkey’s Head Can Change Colors
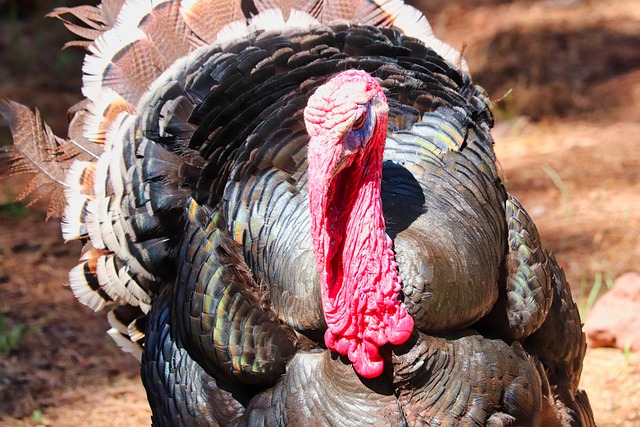
Almost like a giant mood ring, a turkey’s head and neck can change colors depending on their emotions. A turkey’s head is normally either pale pink or bluish gray, but when scared, anxious, excited, or sick, the coloring can change to red, white, or blue (a truly American bird!). And the more intense the color is, the stronger their emotions are.
Turkeys Have a Surprising Relative
If you look at the evolutionary chain that led to modern turkeys you might be surprised to find out that a bird we would often compare it with, the chicken, is separated from it by more than 45 million years of evolution. But that’s not the biggest surprise. If you follow that chain even further back, say to around 150 million years ago, you’ll find the earliest ancestors of turkeys, theropods. Theropods were a group of dinosaurs that included the T. rex, velociraptor, and Archaeopteryx.
Turkeys Can Swim
If you were surprised that wild turkeys can fly, you might be even more surprised to find out that these large birds can swim. They achieve this feat by tucking in their wings, spreading their tails, and kicking. Using this method they can swim up to 1 mile in open water.
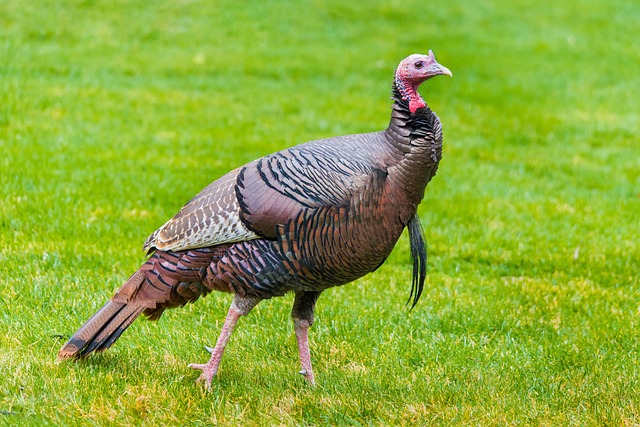
Turkeys Have Beards
When you picture a wild turkey what do you see? You would probably note their large bodies (36 inches for females and 48 inches for males) and brown feathers first. Then you might remark on their bald head, wattle (the red skin on the chin of a turkey), and snood (the red skin that hangs over a turkey’s beak). But did you know they have another distinctive characteristic? They have beards! All male turkeys have a bundle of feathers that sprouts from their chest, this is called a turkey beard, and much like human beards, it gets longer over time. Interestingly, some female turkeys also grow beards, but it’s not as common.
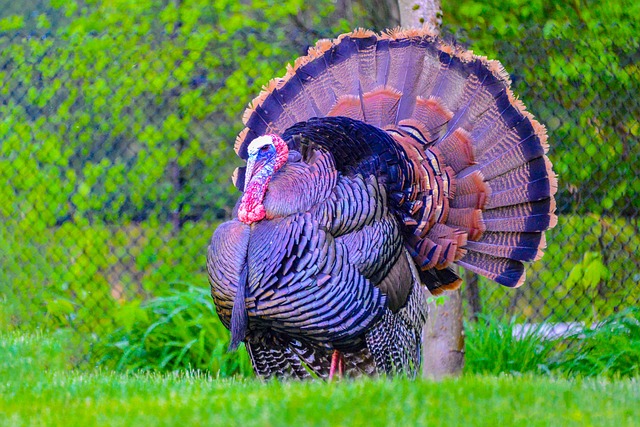
Turkeys Have a Lot of Feathers
Not only do turkeys have between 5,000 and 6,000 feathers, their tail feathers can reach up to 15 inches long!
Turkeys Have Great Eyesight
These marvelous birds are not only faster than humans, they can see much better than we can, 3 times better in fact. Plus they can see in color, and their eyesight covers a full 270 degrees, that’s 90 degrees more than us humans.
Turkeys Have Unique Poop
In fact, a turkey’s droppings can tell you if the bird is male or female. A male has droppings that are shaped like the letter “J”, whereas a female has more spiral-shaped droppings. Even stranger, you can tell the approximate age of a turkey by the size of the poop, the bigger the diameter of the dropping, the older the bird is.
Turkeys Can Weigh a Lot
Generally speaking, male wild turkeys can weigh up to 25 lbs, with females weighing up to 12 lbs. However, the heaviest turkey on record (not a wild turkey), according to the Guinness Book of World Records, was a monumental 86 pounds!
Turkeys Have Stones in Their Stomachs
You might have heard of a turkey gizzard, especially if you have an aunt like mine who always asks for the giblets of the Thanksgiving bird. If you don’t know, the giblets are the heart, gizzard, liver, and neck of the bird. But what exactly is the gizzard? The gizzard is a vital part of the turkey’s digestive system; it’s one of the bird’s 2 stomachs and contains tiny stones (that the bird previously swallowed) that help grind the food that the turkey has eaten. Remember, turkeys don’t have teeth, so they needed a different way to grind up the food they eat.
Turkeys Can Help With Pest Control
If you are lucky enough to have wild turkeys in your neighborhood, they could be providing you with some free pest control. This is not only because they consume insects as a significant portion of their diet, but also because they consume fruits, nuts, and seeds that otherwise could end up as food for mice or squirrels. In both cases, the turkeys help by reducing the populations of pests in your area and lowering the likelihood that these pests will find their way into your home.
Turkeys Were Almost Extinct
During the 1800s wild turkey populations plummeted due to a combination of over-hunting and habitat loss. By the early 1900s, wild turkeys were nearly extinct, with only around 30,000 of these birds left. Fortunately, through restoration efforts, the population of these native birds has risen to 7 million. These efforts have been especially important because there are only 2 species of wild turkey in the world, one native to North America and one native to North/Central America.
A Lot of Turkeys Are Eaten Each Year For Thanksgiving
Around 46 million turkeys are consumed each Thanksgiving. With an average Thanksgiving turkey weighing 20 lbs, that means that 920 million pounds of turkey will be consumed this holiday. That’s an average of 3.15 lbs of turkey per American (factoring in the National Turkey Federation’s statistic that 88% of Americans consume turkey for Thanksgiving). Perhaps even more surprising is that the amount of turkey consumed on Thanksgiving is roughly 20% of the total turkey an average American will consume annually!
Turkeys Brought About the First TV Dinner
If you think it’s difficult to manage all your Thanksgiving leftovers, imagine having 260 tons of turkey leftovers to contend with. That’s what happened to Swanson in 1953 when they overestimated the turkey consumption that year. To mitigate the overage, they created single-serve Thanksgiving meals consisting of turkey, cornbread dressing, gravy, peas, and sweet potatoes and packaged them in 5,000 aluminum trays. This full meal was sold for $0.98 and was so popular that in their first full year of production, they sold 10 million of these meals, and began the enormous frozen ready meal industry.
And in honor of Black Friday, here’s a BOGO deal on a top list: The Top 5 Reasons You Should Call The Bug Dude at 817-354-5350 “OR” 800-310-BUGS (2847) at the First Sign of a Pest Issue:
Author Bio: Alissa Breach has been gaining knowledge and experience around pest control concerns over the last 14 years while working for Mid-Cities Pest Control. She has a creative writing BA from UW-Madison and is always pursuing new and interesting writing projects.
Tuesday, October 17, 2023 | Mid-Cities Pest Control
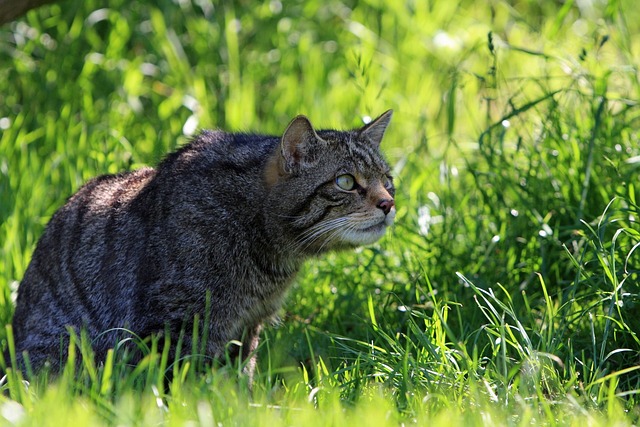
A breeze rustles through a barren tree, its branches scrape sharply at your window. You look out to see a blood moon hanging overhead, a colony of bats passing across it like an angry cloud. A wolf howls in the distance as you watch a black cat begin to cross the road only to stop in the glow of the streetlight, look directly at you, and raise its hackles, baring long, sharp fangs. You take a step back from the window and feel a cold hand on your shoulder, a bit of discolored cloth drapes down your shirt. Shivers prickling your spine, you turn to see a mummy, red eyes glimmering, only inches from your face. After a single sharp intake of breath, you smile at your costumed partner, Halloween is finally here.
If you were to make a list of iconic Halloween images you would most likely include a jack-o-lantern, a witch, and, of course, a black cat. Black cats have been associated with the occult in many parts of Western civilization for nearly 800 years, so it’s hardly a surprise that they are so common in our Halloween decorations, costumes, and celebrations. Yet despite our festive enjoyment of these creatures, black cats tend to have a lower rate of adoption and a higher rate of euthanasia than cats with other coat colors. Now if you’ve ever had a pet cat, or known someone with one, you know that cats of all colors, coats, and sizes can make excellent pets, and black cats are no exception. But sometimes things can go awry and these great pets can find themselves without a home. Even worse, they can end up pregnant, on the streets, and giving birth to new generations of cats who will now be feral. And in the blink of an eye, a few unhoused pet cats can turn into a large number of community cats that can plague people and animals alike.
What Are Community Cats? The term community cats refers to any unowned cat that is living exclusively or primarily outdoors. This includes stray cats, feral cats, lost or abandoned cats, and even cats that receive intermittent care from community residents. And yes, if you were wondering, community cats are the same species of domestic cat as your house pets, though their lifespan is around 2-10 years instead of 13-17 years for house cats.
Stray Cats Vs. Feral Cats Though you might not be able to tell the difference between a stray cat and a feral cat at a glance, there is a very important distinction between these two groups, and being able to recognize which group a cat falls into can help you make sure that any unknown cat that starts visiting your yard gets the help it needs while also keeping you and your loved ones safe. The biggest difference between stray cats and feral cats is simply that stray cats have been socialized to people and feral cats have not. This means that a stray cat once had a home with humans, and has a real chance of being able to find a new indoor home and happiness with a new family. A feral cat, however, is extremely unlikely to ever find peace in an indoor life and instead has made a family with other feral cats. The only exception to this is that feral-born kittens can make excellent pet cats if they are found and socialized with humans at a young age (the younger the better, with 4 months old being generally considered too old to successfully socialize them).
If you have community cats in your area and get a chance to observe them, here are a few signs that can help you determine if they are likely to be stray or feral cats. Stray cats may approach people, houses, or cars, they are mostly solitary, they may meow if you talk to them, they are most active during the day, and they are likely to be dirty. Feral cats, however, will find hiding places to avoid people, commonly live in a colony, won’t meow to you, are mostly nocturnal, are likely to have a clean well-kept coat, and may have an eartip. Eartips (cutting the top corner off a cat’s ear) are done by veterinarians while a feral cat is under anesthesia for a spay/neuter surgery to easily identify released feral cats that have been spayed or neutered.
Once you have determined which type of cat you are encountering, you can better assess your next step in dealing with them. Keep in mind that both types of cats are very capable of showing aggression or running away if confronted, making it a good idea to call The Bug Dude to have an expert technician handle trapping the cat and bringing it to the local animal shelter, rather than attempting such a feat yourself. Being able to provide the shelter with the likelihood of it being either stray or feral can help them assess the cat and determine the next appropriate step to take. Knowing this information can also help The Bug Dude technician more effectively manage the trapping. Finally, if you believe you have a feral cat visiting you, it’s worth keeping an eye out to see if there are more in the area so you can enter into a trapping endeavor knowing the scope of the project.
Are Community Cats a Problem? The short answer is “Yes.” Community cats can cause problems in urban and rural settings and can pose not only an economic and ecological threat, but also a health threat to you, your pets, and your loved ones.
Health Issues Caused by Community Cats Perhaps the biggest health threat that community cats pose is that they are the most common vectors of rabies in domestic animals. In addition, cats can transmit several different diseases and parasites to people: cat scratch fever, plague, ringworm, hookworm, salmonellosis (caused by salmonella), and toxoplasmosis, to name a few. When it comes to diseases that community cats can pass to your pets, the list is even scarier: FIV (feline AIDS), feline leukemia virus (FeLV), feline panleukopenia virus (FPV), rabies, distemper, and various parasites. These diseases and parasites are generally passed via direct contact with the infected cat, but can also potentially be passed through contact with the cat’s feces, or even from a proliferation of fleas caused by these cats (as is potentially the case for plague and typhus). This is especially important to remember as community cats are known for using loose soil (aka gardens and flowerbeds) or sandboxes as their bathrooms.
Ecological Impact of Community Cats Community cats and free-ranging cats (these are pet cats who are allowed to roam free outdoors) are notoriously devastating to native wildlife. If you just look at the numbers, there are about 164 million cats in the U.S., of which roughly 30 to 80 million are outdoors as community cats, and a potentially large portion of owned cats are free-ranging outdoors as well. Thus with tens of millions of these predators running free, it’s hardly surprising that cats are possibly the most significant cause of mortality to native birds, mammals, reptiles, and amphibians. In fact, cats have been partially responsible for the extinction of at least 63 species in the wild worldwide. But their ecological impact doesn’t stop there, they are known to impact wildlife populations through injury and behavioral changes (like reduced feeding chances due to cat harassment). To give an example of community cats’ impact on wild birds, a study was done on more than 80 rehabilitation centers in North America and they reported that cats caused the intake of over 50% of injured birds, and of those nearly 80% died. And while cats can also sometimes kill invasive species like house mice or pigeons, research shows that they haven’t done so in numbers great enough to control those species.
Economic Concerns From Community Cats The first clear economic concern that community cats present is to anyone raising livestock, especially free-range chickens or other domestic fowl. Yes, these cats will prey on those livestock animals, causing losses for anyone raising them. In addition, a recent study estimated that cat damage and management has cost around $22 billion worldwide in less than 50 years, that’s almost $1.3 million a day.
What Can You Do About Community Cats? As a community, the absolute best thing we can do about community cats is to prevent their populations from rising. The number one way to do this is by spaying and neutering the cats. First, make sure you spay or neuter your beloved pet cat so if they get out of the house they don’t end up making more kittens. Second, support TNR initiatives. TNR stands for Trap Neuter Return, a program whereby feral cats are trapped, spayed or neutered, and then returned to their outdoor community. The goal of these programs is to gradually reduce or eliminate feral cat populations by progressively decreasing new generations of cats being born feral. Third, if you, a loved one, a friend, or a neighbor need to re-home your pet cat, bring it to an appropriate animal shelter instead of “setting it free” with feral cats; remember, domestic cats aren’t a native species and don’t belong in the wild.
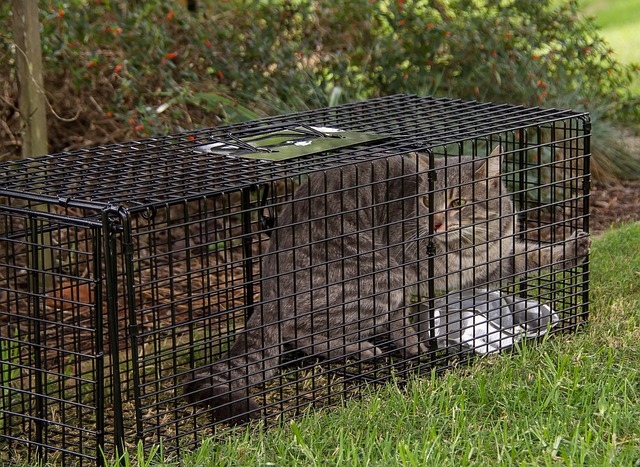
And of course, if you are currently having an issue with feral cats, and don’t have decades to wait for their populations to decline, give The Bug Dude a call at 800-310-BUGS (2847) and let our technicians use humane live animal traps to catch the cats and bring them to the local animal shelter.
Finally, it’s worth noting that though they aren’t community cats, owned free-roaming cats are also part of the problem and are at risk by being allowed outdoors unsupervised. If you want your pet to experience the great outdoors, consider building them a catio, appropriately enclosing your yard, or taking them out for walks on a leash (and yes, this is definitely possible, I take my cat out for daily walks on a leash, or perhaps I should really say that he takes me out for daily walks).
Spaying/Neutering Benefits Not only are spaying (for female animals) and neutering (for male animals) vital to community cat control, but having these procedures done on your pet cat can greatly increase their health and quality of life. A few major health benefits of spaying and neutering your female cats are: reduced chance of them developing a potentially fatal uterine infection and reduced chance of them getting uterine, mammary gland, and other reproductive system cancers. For male cats, these benefits are: eliminating the risk of them getting testicular cancer and eliminating the potential development of prostatic hyperplasia (a condition that affects the cat’s ability to defecate). In addition, a 2013 study showed that spayed cats lived 39% longer than intact female cats, and neutered cats lived 62% longer than intact male cats. That’s a lot more time with your beloved fur baby!
Additional benefits of spaying and neutering your pet cats are that it can help reduce behaviors that can exasperate both you and your cats. By spaying and neutering your cat, especially when it’s done when the cat is under 5 months old, you can drastically reduce mating-related behaviors. A few examples of these behaviors are: spraying, yowling, roaming, and fighting. Not only will this make the house more peaceful for you, but it will give peace to your cat who otherwise can be plagued by intense and unnecessary hormonal urges. And these benefits also apply to spayed/neutered feral cats, which can give some needed relief to inundated homeowners.
When To Call The Bug Dude If you are having an issue with one or multiple cats invading your yard (and you’re sure it’s not your neighbor’s pet), and you’re ready to end the long nights of howling cats, the unexpected finding of cat droppings, and the terrifying catfights, and reclaim your territory, then it’s time to call in the experts. Just call The Bug Dude at 817-354-5350 and let our experienced technicians humanely trap those pesky cats and take them to a local animal shelter to be appropriately taken care of. With years of experience dealing with live animal trapping, our technicians know every trick in the book when it comes to finding ways to entice clever animals into traps. From understanding animal behavior, to knowing their favorite foods, to clever tricks to employ to make a trapping program successful, our technicians will work hard to make sure they can eliminate the community cats from your property.
This Halloween if you notice a black cat crossing your path, don’t worry about the superstitions, but do keep an eye out for if it has a collar, and be ready to call The Bug Dude at the first sign that community cats have taken over your yard.
Author Bio: Alissa Breach has been gaining knowledge and experience around pest control concerns over the last 14 years while working for Mid-Cities Pest Control. She has a creative writing BA from UW-Madison and is always pursuing new and interesting writing projects.
Friday, September 15, 2023 | Mid-Cities Pest Control
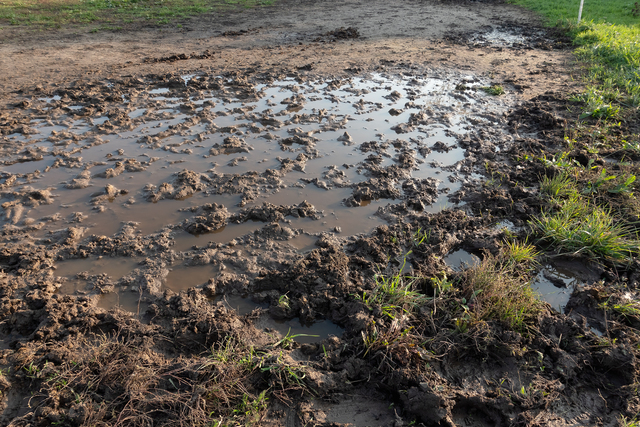
Water. We all know how important it is for sustaining life. A human can only live for around 3 days without water, and it’s been reported that about 10,000 people in the U.S. die each year after being admitted to the hospital for dehydration. But even if you have enough water to survive, without plenty of available water, your comfort and sanitation levels can decline rapidly. If you lived in Texas during the massive winter storm in February of 2021, you (like me) might have first-hand experience of the many difficulties of living without running water.
But did you know that too much water can also be dangerous? For people, drinking around 6 liters of water in around 3 hours can potentially be lethal! And if it’s possible to over-hydrate yourself, it should come as no surprise that the over-hydration of other things people care for, specifically plants, is not only possible but quite common. This means that you are likely over-watering your yard, maybe even to the point that you are severely damaging it, and you might not even know it.
By Tevarak Phanduang on Vecteezy
But why are we talking about the importance of water?
First, if you’ve seen the news lately, you probably know that Texas is in the midst of a severe to exceptional drought, and that means water is at a premium as it becomes ever scarcer. One of the best ways people can help amid this drought, according to Texas Living Waters, is to reduce nonessential water use. A prime example of how to achieve this is to reduce things like watering your lawn or washing your car during peak demand times. As The Bug Dude is a part of this wonderful Texas community, we want to help spread the word on taking care of the amazing resource of fresh water at a time when it’s most needed (yes, we are talking about the extreme heat we’ve all been enduring).
Second, at The Bug Dude we want to do everything we can to help you keep your yard healthy and pest-free, and one of the simplest, but most effective ways to achieve this is through proper watering. If you’re a regular reader around here, you have probably noticed that moisture and sources of water are a regular enticement for insects and wildlife, and that’s just the tip of the iceberg when it comes to the problems that can be encountered with excessive watering.
By Narong Pobout on Vecteezy
How is Overwatering Your Yard Harmful?
You might be surprised to learn that over-watering your yard can be harmful in several different ways, from damage to the individual plants to damage to the environment to financial concerns, and so much more.
Damage to the Plants: The most straightforward way that over-watering is harmful is that it negatively impacts the health of your yard, from grass to landscaping. The first way it does this is by causing the roots of the plants (grass included) to become shallow. If the plants always have water available at the surface level, their roots won’t have to grow deeper in search of water. Not only does this leave the plants less structurally sound and resilient, but it also leaves them more prone to infection and insect damage.
But shallow roots aren’t the only damage the plants will suffer. When you flood the soil with water, it takes up the empty spaces in the dirt where oxygen resides. Much like us, plants need to intake oxygen to survive, and when you over-water them it’s rather akin to drowning them. Even if they don’t drown, too much water can wash away vital nutrients for the plants, again leaving them weakened and susceptible to damage.
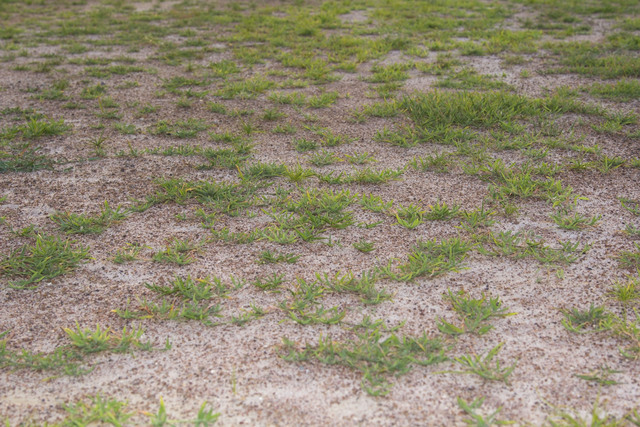
Weeds, Fungi, Pests, and Aesthetics: An over-watered yard is prone to growing an excess of weeds, especially crabgrass, as this environment is one in which these plants thrive. These weeds can overtake the beautiful grass and landscaping you care so greatly about. Another over-watering issue can be the fostering of fungi, both the kind that form directly on the plants, discoloring and damaging them, as well as mushrooms that pop up in your yard (some of which could be dangerous for pets or kids). Not only are both of these issues aesthetically displeasing, but over-watering can also lead to discolored and dry grass and leaves, which are a sign that your plants aren’t healthy and are also a blemish on the yard you are trying to care for.
Finally, not only are pests drawn to water and moist areas, they can use the thatch layer that often accompanies over-watering as a place to hide. When there are copious easy places for pests to hide, it makes it much more difficult even for skilled technicians to quickly and effectively eliminate the issue. And even worse, some of the most structure-damaging pests (carpenter ants and termites) like moist areas. So if you see an influx of pests on your property, whether it’s from over-watering or not, give The Bug Dude a call at 817-354-5350 as soon as you notice the issue.
Environmental: When it comes to using excess water on a yard the first environmental impact is that of wasting water. Since Texas is in the midst of a drought and is only a little over a decade past a long-lasting, extreme drought, it’s pretty clear that essentially throwing away this limited resource is something that can negatively impact a lot of people.
The other big issue for the environment when you over-water your yard is that any chemicals you may have put on your grass or plants will contaminate the run-off and enter the stormwater system, thereby polluting nearby streams or rivers. Even worse, you could end up pushing those chemicals into the groundwater that supplies your community’s drinking water.
Financial: The first financial issue is simple, when you over-water you will spend money on water that you don’t use. Since water prices are likely to rise as scarcity increases, this could quickly add up. But the real financial burden comes when droughts arise, as you can see in this article by the Texas Comptroller. Though the initial burden will be borne by the ranchers and farmers, the costs could easily find their way to consumers as items become rarer and more difficult to produce.
By Anna Chaplygina on Vecteezy
How Do You Know If You’re Overwatering Your Yard?
There are a few tell-tale signs of an over-watered yard. If you notice any of these, it’s worth taking the time to check the moisture of your soil before doing any more watering.
You see puddles of water in your yard or you see runoff (rivulets of water) coming from your lawn.
Your lawn is muddy or feels spongey or squishy when you step on it.
Your grass doesn’t quickly bounce back when you walk across it.
You see dry or discolored patches in your grass or on landscaping leaves.
Your yard has a lot of weeds.
Your yard is growing fungi (mushrooms or fungal discoloration on leaves or grass blades).
You notice excessive thatch build-up in your yard.
You notice an influx of bugs in your yard or your home.
By Artinun Prekmoung on Vecteezy
How Should You Water Your Yard?
There are quite a few factors to consider when deciding how often to water your lawn and landscaping, and how much water to use when you do water it. Knowing the kind of grass and plants you have, their health and history, the type of soil you have, if you have mulch around your plants, and much more can go into determining exactly how you will water your specific yard. For some basics on this, check out this guide from the Texas Water Development Board.
In general, though, the first rule of thumb is that it’s almost always better to under-water than to over-water plants (including grass). If the soil around your plants looks wet, you should skip the watering. However, even if the soil around the plants looks dry on top, that doesn’t mean it’s time to water. Since surface soil dries out the quickest, especially in Texas heat, it can look fully dry even though there’s still plenty of water for the plants a few inches down. A simple way to determine how much water is in the soil below the surface is to invest a few dollars in a soil moisture meter that can read at least 6” below the top of the soil. Once the soil is pretty dry, it’s time to water again. With the robust summers we face in Texas, this could be as often as a few times a week. Generally, however, the suggestion is to water your yard about once a week when it’s warm out and about once every 2 weeks (or possibly less) in the winter.
When you do water your yard, you want to aim to soak the soil down to about 6” for grass, up to 10” for perennials, and up to 12” for trees and shrubs. Again, a soil moisture meter can help you determine just how much watering this will be. Remember, when you water your lawn, whether it’s with a sprinkler system or with a hose, you want the water coverage to be low to the ground, in large drops (as opposed to a mist), and to have time to be absorbed; this isn’t a process you can rush. The rule of thumb here is it’s better to water deeply and thoroughly than to water frequently.
Also important to note is to be sure to regularly check the weather before you water your yard as you don’t want to water on days when it’s due to rain (or immediately after, if it was a relatively significant rain).
One final note on watering during a drought: consider letting your grass go dormant. This would of course mean letting go of having a beautiful, lush, green yard, but if done correctly, your grass can survive the drought and spring back in just a few weeks once regular watering commences. For more on this, check out this article from Purdue University.
By TsunamiHolmes on Vecteezy
When Should You Water Your Yard?
The ideal time to water your yard is in the early morning before 10 am, the earlier the better; this gives the plants time to utilize the water before the sun starts to evaporate it. Though evening watering may seem convenient, it leaves your yard more susceptible to fungal growth with the moisture lingering on the soil all night.
Though lawn watering might not be the first thing you think of when you hear about The Bug Dude, we deal with a lot of pest, lawn, and ornamental issues that are caused or exacerbated by the over-watering of yards. And though we are always here to help if a pest issue arises (just call us at 800-310-BUGS 2847), over-watered yard or not, we encourage everyone to make a change and really evaluate their water usage, especially in this time of heat and drought. The DFW area is a wonderful community, and if everyone just takes a moment to survey their lawn we could end up helping with the drought while getting to enjoy healthier Texas yards, which just sounds like the perfect ending to an extra hot summer to us.
Author Bio: Alissa Breach has been gaining knowledge and experience around pest control concerns over the last 13 years while working for Mid-Cities Pest Control. She has a creative writing BA from UW-Madison and is always pursuing new and interesting writing projects.
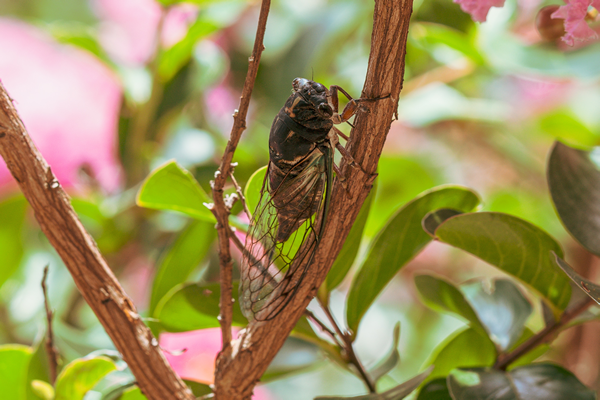
When you think of a quintessential summer in Texas what comes to mind? The heat? The long, sunny days? Going for a swim? Or maybe, the distinctive sound of summer evenings, that particular whirring, whining, chirping sound that permeates the air? Yep, we’re talking about cicadas. But what do you really know about these pests that are so indicative of summers in Texas? To find out more about the insects that are such an intrinsic part of this season, keep reading.
What Do Cicadas Look Like?
There are two main types of cicada: periodical and annual. Annual cicadas tend to be larger than their periodical counterparts and are around 1.625 inches long and 0.5 inches wide. Periodical cicadas are between 1 and 1.5 inches long. The exact coloring of these pests depends on their species, but they all share the following traits: stout bodies, bulging eyes, semi-transparent wings which are longer than their abdomen, short antennae, and wings which are held tent-like over their bodies. In general, annual cicadas have a combination of brown or green, black, and white markings on their bodies. Periodical cicadas tend to have black bodies, reddish eyes, and noticeable orange veins in their wings.
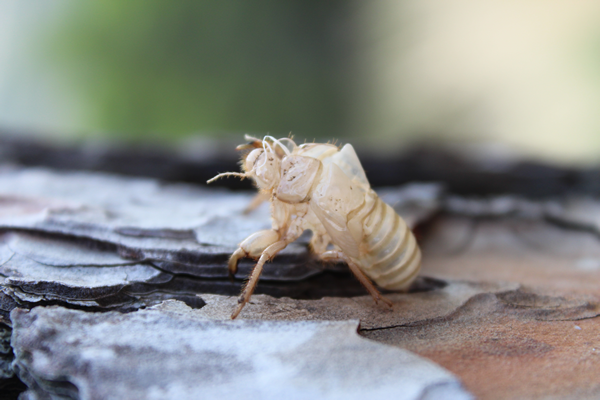
Cicada nymphs, the immature young of the species, look similar to adults except they are dark brown and wingless. If you’ve ever encountered the empty husk of a cicada stuck to your deck, house, or trees, it’s the leftovers of the final stage these nymphs go through in reaching their adult form.
What’s The Difference Between Periodical and Annual Cicadas?
In order to understand the difference between these two groups of cicadas it helps to know a bit more about their life cycle. For both types of cicadas, it all starts when female cicadas insert clusters of eggs into twigs and small branches of trees via the use of their saw-like ovipositor (egg-laying structure). After about 6 weeks, small nymph cicadas hatch from the eggs and drop from their branch to the ground. Once on the ground, they burrow into the soil and will molt through several stages underground (sometimes several feet deep). When they have reached their final nymph stage, and the weather has sufficiently warmed up, they will dig themselves out of the ground during the night, leaving a 0.5 inch hole in the ground behind them. They will then climb up nearby objects, most often tree trunks or other plants. When they have fully matured, the adult cicada will emerge from the final nymphal stage via a crack along the back of the nymphal skin and will leave the light brown empty cast skin behind (often still sticking to the tree or object it was attached to). The adults will live for about 5 to 6 weeks, during which time their energy will be primarily focused on mating.
Now here is where the big difference comes in between the two groups of this pest. Periodical cicadas (of which there are only 7 species, 1 of which occurs in Texas) only emerge as adults once every 13 or 17 years, and they do so en masse, with billions (or even trillions) of these insects suddenly being seen in their native regions. This generally happens from late April through June. Annual cicadas, however, have life cycles of 2 to 5 years, and with roughly 159 species in the U.S. and Canada (roughly 39 in Texas), that means that you are likely to see cicadas emerging every year between July and September.
Where Do Cicadas Live?
The annual varieties of these large pests can be found throughout the world, but the periodical varieties are unique to the U.S.A. and are most commonly found in the central and eastern regions, though Texas is also home to a species of 13-year periodical cicada. These insects live exclusively outside, though they are known to accidentally find their way inside homes; but once they are indoors, they won’t reproduce or set up a colony. Outdoors, they are generally found on or near trees and other plants.
What Do Cicadas Eat?
Nymphal cicadas feed on sap from tree and plant roots. Adults suck juices from tender twigs and branches of woody shrubs and trees.
Why Are Cicadas So Loud?
The “song” of a male cicada is used primarily to attract a mate (though it can also sometimes be used as a defense mechanism). Only the males can make the distinctive whirring noise we so strongly associate with these insects. The males will rest on trees and create this sound by vibrating special structures on the side of their abdomen; this sound is then amplified by the large air sac that fills most of their abdomen. In fact, this amplification is so strong that their “song” can get up to 90 decibels, which is about the same as a lawnmower. When combined with the “songs” of the other males trying to attract mates, the noise can be quite irritating and uncomfortably loud. Interestingly, different cicada species have different “songs;” you can hear a selection of the variety here.
Are Cicadas Dangerous?
Generally speaking, cicadas aren’t very dangerous. For humans, these insects are irritating and can be rather scary to encounter, but they can’t bite or sting and don’t carry disease. For pets, if they consume these insects, it could cause digestive issues or discomfort (the tough cicada wings could even lodge in your pet’s throat). For property, they can potentially damage the filters for pools and hot tubs; essentially, the insects land in the water, get trapped, die, and then clog the filters, possibly burning them out. They present the most danger to trees, especially young trees, and can cause damage to these trees both when they lay their eggs in the branches and when the nymphs feed on the roots (this is more of an issue for the large populations of periodical cicadas than it is for annual cicadas).
How Do You Prevent Cicadas?
There are a few main things you can do to help prevent cicadas from causing problems for you:
Keep your trees and shrubs trimmed and pruned.
By doing this, you will reduce the places for this pest to hide and make it easier for you to detect their presence and eliminate them.
Clean up any dead cicadas you find around your property.
Not only will this help you avoid the smell that can happen as they decay, but it will also help prevent further pest issues that can arise as a variety of insects descend on the carcasses for a feast.
Before the cicadas emerge from the ground, use foil barrier tape and netting on susceptible trees and plants.
These items can help block these pests from climbing up your at-risk trees or landing on at-risk plants.
Keep pools and hot tubs covered when not in use.
This will reduce the potential for filter damage from these pests.
Keep window and door screens in good condition.
This lowers the likelihood of cicadas finding their way into your home.
Cover any patio furniture located under trees.
Adult cicadas spend a lot of their time in trees, and they do their feeding up there too. So when it’s time for them to emit waste, it’s not a big surprise they do it in the tree as well, which means that anything under the tree could end up with cicada urine on it.
Do yard work early in the morning or late evening.
Cicadas are generally most active during the warmer parts of the day, and the vibrations and noise from yard equipment can attract cicadas to you. By using yard equipment when it’s cooler out, and these insects aren’t as active, you have a greatly reduced risk of being surrounded by these large, loud pests.
How Do You Eliminate Cicadas?
If you’re only seeing a few cicadas around your yard and their “song” isn’t ruining your summer evenings, then you probably don’t have to do anything but wait for cicada season to be over. However, if you find yourself inundated with these pests flying around your yard, entering your home, leaving cast skins everywhere, and making it impossible to find any semblance of quiet, then give The Bug Dude a call at 800-310-BUGS (2847) and let our expert technicians put together a treatment plan that will help you retake your yard.
Whether this summer finds you battling cicadas or any other pest that keeps you from enjoying a peaceful evening at home, at the first sign of a problem call The Bug Dude at 817-354-5350 so we can help lower the decibel on your pest issues.
Further Reading:
“Dog-Day Cicada” – Field Guide to Common Texas Insects, Texas A&M AgriLife Extension
Author Bio: Alissa Breach has been gaining knowledge and experience around pest control concerns over the last 13 years while working for Mid-Cities Pest Control. She has a creative writing BA from UW-Madison and is always pursuing new and interesting writing projects.
When the calendar turns to July each year what’s the first thing you think of? If you’re like us here at The Bug Dude, you will undoubtedly think of the eminent holiday: the 4th of July, U.S. Independence Day. The thought will likely bring with it the anticipation of BBQs, swimming, local festivals, parades, and of course, fireworks. But did you know that there’s another celebration happening in early July that’s all about beautiful things glowing in the night sky? And though there’s no actual fire (as there is with fireworks), the word is in the title of this dedicatory day. If you haven’t guessed yet, the first weekend in July boasts World Firefly Day. This is a day to celebrate the gorgeous insects that remind us of our childhoods and the magic that can happen all around us. But what do you really know about these little glowing creatures and how can you help make them part of your July celebrations?
Why Are They Called Fireflies?
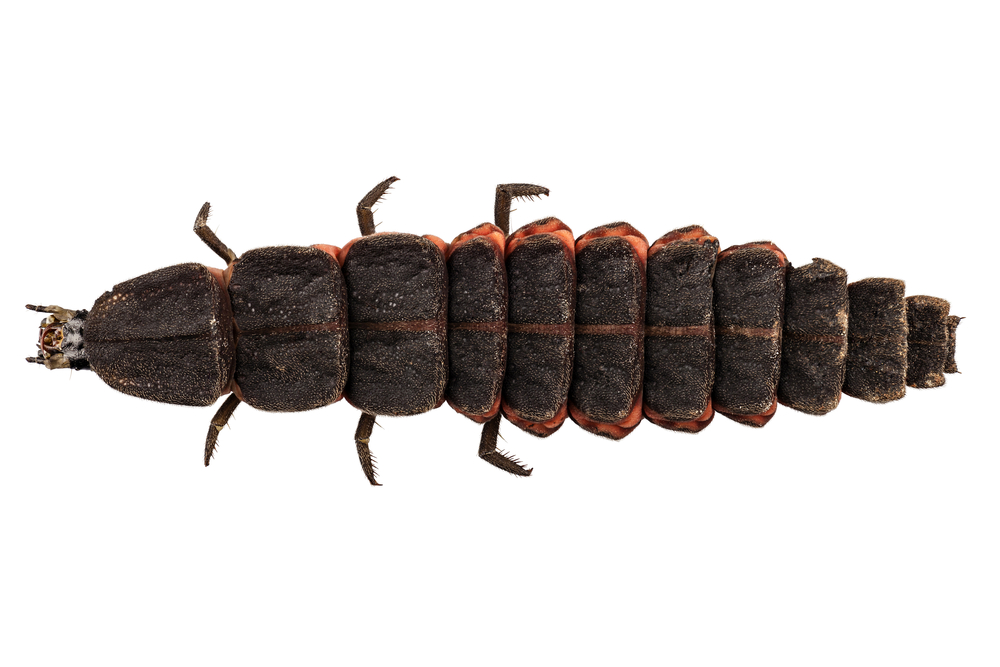
Fireflies, often called lightning bugs, got their name because of their unique ability to send glowing flashes of light from their body. However, both of their names are a bit misleading, as they are neither a fly nor a true bug. They are, in fact, a type of beetle. Indeed, even the “fire” part of their name is quite misleading as the chemical reaction that causes their glow is so extremely efficient that virtually 100% of the energy created is emitted as light. This means that no heat is emitted alongside their glow (unlike fire, or even the common light bulb), and in fact, their glow is referred to as “cold light.” The “lightning” part of their moniker is nicely descriptive, though, as they send distinct intermittent flashes from their abdomen, somewhat like a lightning flash in the sky. So if you want the most accurate name for these creatures, a lightning beetle would be the best way to go, but it’s definitely hard to resist the bucolic charm of the term firefly.
Now if you thought that the above issues gave the firefly a significant misnomer, consider that there are quite a few firefly species that don’t even glow as adults. In fact, in order to be considered a firefly, the glowing only has to happen at the larval stage, though it can of course happen at other stages (like adult or egg) as well. So it’s entirely possible that you could have encountered an adult firefly that looks just like an average beetle and you would never even know its true identity.
Night coniferous forest with magical fireflies
What Do Fireflies Look Like?
With over 2000 species of firefly in the world, and at least 5 common species in Texas, it’s safe to say that these insects can have a rather varied appearance. In general, the species you are most likely to encounter and recognize as fireflies will be between 5mm and 15mm long. They have a dark-colored oblong body with a red marking near their head, dark wing covers, and the last several segments on the underside of their abdomen will be a greenish-yellow (this is the section that can produce light). Their larvae are very different in appearance from the adult form and are flattened with several shield-like segments. You may have heard the term “glow worm” before; this term generally refers either to a glowing wingless adult female firefly or to the (also wingless) firefly larvae. Interestingly enough, one of the easiest ways to distinguish between firefly species is to watch their light show; different species will glow at different intervals, for different durations, and even in different shapes.
Where Do Fireflies Live?
Fireflies can be found on every continent except Antarctica. They prefer temperate and tropical regions, however, so will be most abundant in those areas. Different species of fireflies are drawn to different habitats within these ideal regions. In Texas, you can find species that prefer muddy creeks, open areas near woods, suburban lawns, or even along roadsides.
Firefly female larva species nyctophila reichii common lightning bugs or glow-worm in high definition with extreme focus and DOF (depth of field) isolated on white background
What Do Fireflies Eat?
Firefly larvae are carnivorous and generally consume small insects, worms, slugs, and snails. The majority of a firefly’s life is spent in this life stage. After 1 to 2 years as a larva, it will pupate and in just a few weeks will be an adult. An adult firefly lives only about 3 or 4 weeks and can have widely varied diets depending on the species. Some species mimic the light flashes of other firefly species in order to lure these insects in as prey, some feed on pollen and nectar, and some may eat nothing at all as adults.
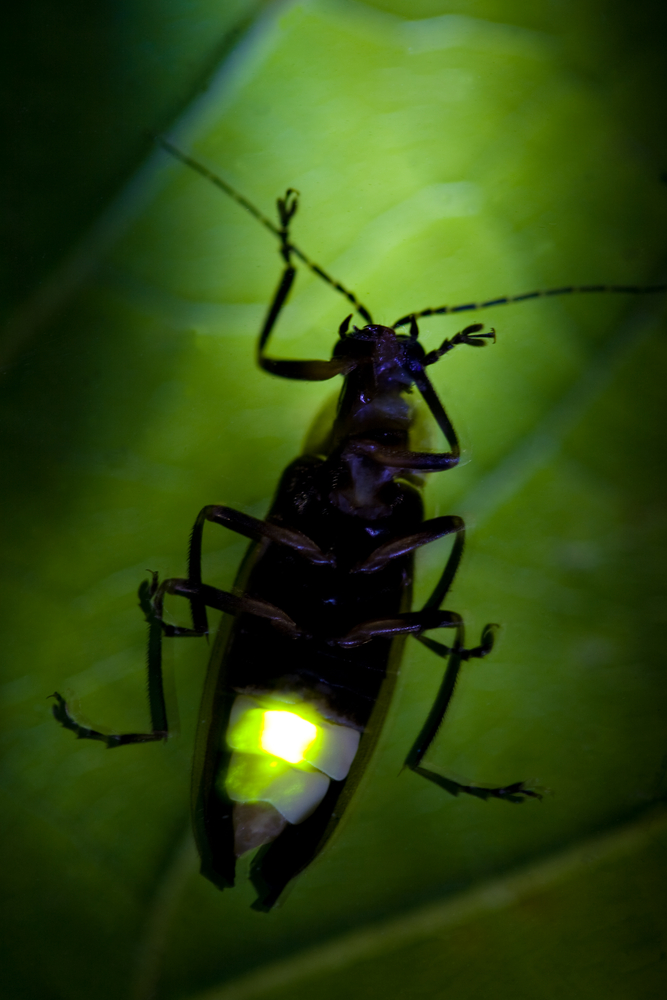
Firefly Flashing at Night – Lightning Bug
What Makes Fireflies Glow?
The distinct form of bioluminescence that fireflies exhibit is caused by the interaction of 2 substances in their body: luciferin and luciferase. Interestingly enough, luciferase (which was originally only obtainable from fireflies themselves) is a useful chemical for scientific research and it can help detect diseased cells in humans as well as help test for food spoilage. While many fireflies manufacture their own luciferin, some get it as larvae by consuming milkweed roots, and there is at least one species of firefly that cannot make this chemical itself. In order for this last type of firefly to obtain the chemical, the females of this species will mimic the flash patterns of a different, luciferin-producing, species, luring in males of that species who are looking for a mate. The female will then attack the male of the other species and consume it alive until she has enough luciferin to pass on to her young.
The glowing flashes that fireflies emit are used as a form of communication. While this communication is generally done to attract a mate, it can also be used to help them defend their territory or even to warn away predators. While a firefly might seem like a harmless insect, the luciferin that makes them glow is in fact toxic and will make them a bitter and potentially dangerous snack for any predator.
A man’s hand is about to switch off the bulb light. Brick wall as background.
How Do You Encourage Fireflies In Your Yard?
Fireflies are an idyllic symbol of summer, but you may have noticed that they are getting less and less common lately. Though the exact causes of population decline in these delightful insects aren’t known for certain, there are 2 undeniable contributing factors: loss of habitat due to human development, and light pollution. While those may seem insurmountable obstacles, there are some steps you can take to make your yard more hospitable to local firefly populations. And if you can convince your neighbors to take part, you will have an even better chance of seeing these beauties flying around your yard at night.
Have an established garden with moist soil; this will give the females a safe place to lay their eggs
Larvae will live in soil and leaf litter, so don’t just rake up leaves and throw them away, as you will potentially be throwing away future fireflies. If possible, create a compost area in a shady part of your yard for these leaves to reside in, and keep the area well-watered
Keep your soil healthy and nutrient-rich to attract fireflies and their prey
Keep a portion of your yard in a more natural state (logs, leaf litter, native grasses, etc.)
Don’t over-mow your yard
Reduce or eliminate light pollution in your yard, especially during the times when fireflies are most active (from May to October when the temperature is between 70° and 90°, starting just after sunset and lasting till around 10 pm). This means turning off any outdoor lights and covering your windows if you have interior lights on.
If possible, create a small pond in your yard. Fireflies thrive in wet environments. Remember, though, that in order to be effective, it needs to be a non-treated environment (so a chlorinated swimming pool is not a viable option).
This July consider adding firefly watching to the list of nighttime magical light displays you can enjoy during the summer holiday. And remember, though fireflies are an insect most of us would heartily welcome into our yard, if there are other pests threatening your peaceful summer nights (or days), give The Bug Dude a call at 800-310-BUGS (2847) and let our expert technicians help get you quickly back to enjoying the long summer nights and enchanting glowing spectacles.
Further Reading:
“Firefly” – Field Guide to Common Texas Insects, Texas A&M AgriLife Extension
Author Bio: Alissa Breach has been gaining knowledge and experience around pest control concerns over the last 13 years while working for Mid-Cities Pest Control. She has a creative writing BA from UW-Madison and is always pursuing new and interesting writing projects.
Wednesday, June 14, 2023 | Mid-Cities Pest Control
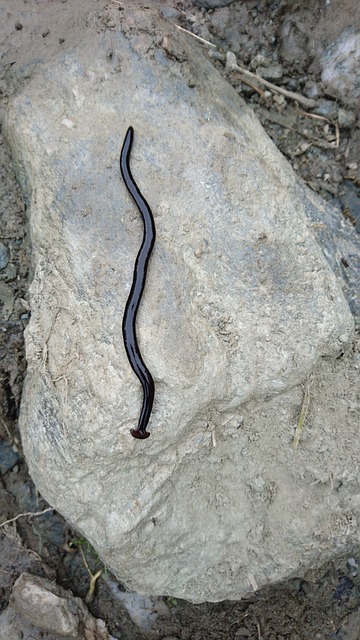
If I were to say to you, “hammerhead,” what would be the first thing you think of? Most likely you thought of the distinctive hammerhead shark. But what if I were to tell you it’s not the only “hammerhead” animal around? And even stranger, this other “hammerhead” could be in your yard right now. So what is it, and is it as intimidating as the nearly 20 feet long great hammerhead shark? Well, the good news is that it is significantly smaller and toothless, but the bad news is that it’s toxic and a potentially dangerous predator; it’s the hammerhead flatworm.
What do Hammerhead Flatworms Look Like?
Much as their name suggests, these creatures have a head shaped like the notorious hammerhead shark, except it’s a bit more rounded than the sea-dwelling hammerhead. Hammerhead flatworms (Bipalium kewense) are terrestrial flatworms that can grow up to 15 inches long, though they are generally more like 8 to 12 inches in length. They have a snake-like, narrow body, which is generally a honey color with between 1 and 5 dark stripes running along their back and a dark partial collar.
Where do Hammerhead Flatworms Live?
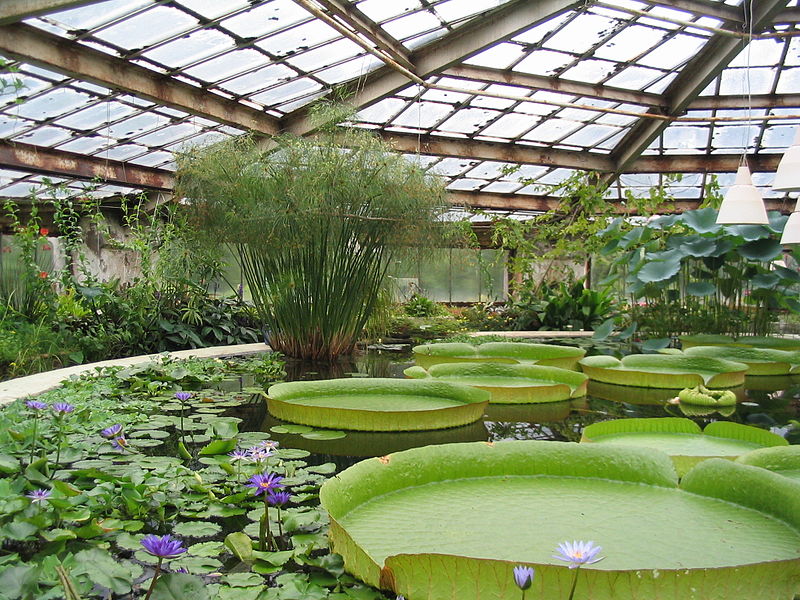
Hammerhead flatworms are natively from Southeast Asia but have been an invasive species in the U.S. since at least 1901. These pests are notorious hitchhikers and are believed to have originally found their way to our shores with horticultural plants and have since thrived in greenhouses and in other hot, humid locations. Currently, they can be found outdoors in 9 states, and yes, one of those is definitely Texas. And they are still a well-known hitchhiker, so be sure to check for them in supplies of landscaping, mulch, and nursery plants.
These pests will be found almost exclusively outdoors. Most days they can be found in areas of high shade and moisture. Some common examples are under rocks, under fallen leaves, under logs, under shrubs, and even under leaking or dripping garden spigots. On some occasions, like after a heavy Texas rainstorm, they can be found in the same sorts of places you might see earthworms after a deluge: on sidewalks, driveways, and on top of the soil in your yard. Since they are sensitive to light, they are active primarily during the night.
What Exactly is an Invasive Species?
The U.S. Department of Agriculture defines an invasive species as: “an alien species whose introduction does or is likely to cause economic or environmental harm or harm to human health.” In short, they are non-native species (whether plant or animal) that have been so successful here that they are dangerous to our ecosystem, agricultural businesses, or to human health. For more on some common Texas invasive species, see our articles on crazy ants, murder hornets, stink bugs, and ghost ants.
What do Hammerhead Flatworms Eat?
If the appearance of these pests hasn’t creeped you out, just wait till you find out how the carnivorous hammerhead flatworms eat. When they find their prey, they wrap around it, surrounding it in a sticky mucus, and then use special enzymes that digest the prey before they ever consume it. Once the enzymes have done their work, and their prey is essentially just goo, the hammerhead flatworm sucks in its meal using its mouth which is located in the middle of its body on its belly. To add to the horrific image, remember that this is all happening during the dark nighttime.
So which creatures are unfortunate enough to end up as hammerhead flatworm food? They are most notorious for their predation of earthworms, but they are also known to regularly prey upon other small invertebrate organisms like slugs, and snails; on occasion, they will also consume insects like pill bugs and springtails.
Are Hammerhead Flatworms Dangerous?
The short answer here is “yes,” hammerhead flatworms are harmful in several different ways. Of biggest concern is their ecological impact due to their predation of earthworms. As you probably already know, earthworms are vital for the health of our soil, and the health of our soil depicts the well-being of our crops, forests, gardens, yards, and even our compost piles. So if the hammerhead flatworm thrives in an area, it can end up posing a real threat to all plants in the vicinity.
In addition, they secrete chemicals through their skin as both a defense mechanism and to aid in digestion, these chemicals can cause skin irritation on people if they hold the hammerhead flatworm and on pets if they consume it. In fact, these pests produce tetrodotoxin; if this sounds familiar, it is the infamous substance that makes puffer fish deadly. Fortunately, they produce it in such small amounts that a single hammerhead flatworm doesn’t pose a real threat to people or pets from this toxin. Though if your pet does consume one, it’s likely to be sick for a day. Finally, as a flatworm, these pests can have parasitic nematodes within them, which could potentially cause health issues for you or your pets if you come in contact with them.
How do you Prevent Hammerhead Flatworms?
Unfortunately, there is no real way to prevent these pests from invading your yard and garden. In terms of preventing these pests from thriving in Texas, the best thing to do is to contact the Texas Invasive Species Institute at invasives@shsu.edu with a picture and your coordinates to aid in their study of the issue.
How do you Eliminate Hammerhead Flatworms?
At the moment, the elimination of hammerhead flatworms has to be done on an individual scale, meaning that each flatworm has to be found and killed separately. There is currently research into pest control methods that would allow for the elimination of these flatworms without risk to earthworm populations, so if you see a hammerhead flatworm in your yard, give The Bug Dude a call at 817-354-5350 to see what we can do to help you.
If you do encounter a hammerhead flatworm the most important thing is that you do not try to chop it up with a garden shovel or any other instrument. These pests reproduce by fragmentation, which means that a portion of the worm naturally pinches off and within about 10 days that portion will become an entirely new worm. So if you chop the worm in half, you aren’t killing it, you’re just making 2 hammerhead flatworms to have to contend with.
So what do you do if you find one of these pests in your yard? First, using gloves, a stick, or a paper towel, pick up the worm and place it in a Ziploc bag. If you are not willing or able to do this, do your best to enclose the worm in some sort of container so that it cannot simply wriggle away, and call The Bug Dude at 800-310-BUGS (2847). If you have enclosed the worm in a Ziploc bag, contact The Bug Dude and the Texas Invasive Species Institute, and once that is done, you can kill the worm by pouring either salt or vinegar in the bag with the worm, sealing it up, and throwing it away. Be sure to thoroughly wash your hands after your encounter with this worm.
If you’re like most people, you probably hadn’t heard of the hammerhead flatworm before today, much less knew what it looked like. But if you’re living in the DFW metroplex, then you know that you can always call The Bug Dude at 817-354-5350 about any strange pest you find lurking around your home or yard and our expert staff will do everything we can to help identify and eliminate your pest woes. So whether it’s a hammerhead flatworm or a fire ant, at the first sign of a pest problem, give The Bug Dude a call.
Author Bio: Alissa Breach has been gaining knowledge and experience around pest control concerns over the last 13 years while working for Mid-Cities Pest Control. She has a creative writing BA from UW-Madison and is always pursuing new and interesting writing projects.
Mother’s Day is fast approaching and while there are so many wonderful ways to celebrate the amazing mothers in our lives, there’s a good chance that your celebrations will involve either delicious food or enjoying the great outdoors, or both. Whether you’re planning a picnic, a BBQ, or a nice meal out followed by margaritas by the pool, the last thing you want is for an uninvited guest to crash your mom’s special day. And it’s even worse if that guest has 6 legs and brings thousands of its friends. Yes, we are talking about ants. But not just any ant, we’re talking about an ant that is comfortable around humans, excited to feast on all the sweet treats you can provide, and just an all-around stinker: odorous house ants.
What do Odorous House Ants Look Like?
Odorous house ants are a small ant, only 1/8” long. The worker ants, which comprise the majority of the ant colony, are monomorphic, meaning they are all the same size. They range very little in color, from brown to black, and have a smooth, hairless body. Though there are other characteristics that can help a professional differentiate this type of ant from other small ants, without the benefit of entomological knowledge or a microscope, these characteristics are extremely difficult to detect.
Why are they Called Odorous House Ants?
Perhaps the most notable part of this ant’s name is the very beginning: odorous. They obtained this moniker because when they are crushed they give off a specific rotten coconut-like scent. However, the accuracy of their name doesn’t stop there. The fact that they are called house ants is not accidental. Though they can be found in many different places, they are most often found foraging for food in and around homes.
Where do Odorous House Ants Live?
Before we look at exactly where odorous house ants live, it’s necessary to discuss some characteristics of how this ant operates. In fact, these particular ants share certain significant attributes with several other ant species, and these commonalities have led to the creation of a specific term for this group of ants, they are all “tramp ants.” Importantly, “tramp ants” all share certain habits that make them highly successful and very difficult to control. Some of these traits include: having multiple egg-producing queens per colony, having multiple subcolonies located on separate sites, the ability to distinguish between related and non-related ants and act without hostility toward related ant colonies, the ability to create supercolonies (friendly subcolonies of ants connected by ant trails where they can exchange food, workers, and larvae/pupae), the ability to reproduce by budding (a process where a group of workers and a fertile queen or queens leave to create a new colony) – though it’s also worth mentioning that odorous house ants can also reproduce via mating flights, the ability to live closely with humans, and the ability to thrive in a diverse range of nesting locations. In addition, their colonies can range from quite small (15 or so workers) to giant (hundreds of thousands of workers), with most being in the tens of thousands. Even worse, they are very adept at quickly relocating a colony when it’s disturbed or threatened. All of this means that though you might see these ants in one place at one time, they can quickly move or spread. So if you see any sign of these ants, even if it’s only in one location, it’s worth having The Bug Dude out to help you make sure you don’t have a more extensive infestation than you think you do.
That all said, where exactly will you find these ants?
Outside: they make shallow nests in the soil under a wide array of items. Some of the most common areas are under rocks, mulch, wood piles, decorations, paving stones, and patios. If the ants are disturbed in these areas they will quickly move and may move into places like tree cavities, bird nests, gardens, or even around the base of trees.
Inside: they are looking for undisturbed warm areas that are high in moisture. Some common rooms to find them in are bathrooms and kitchens. Generally, they will be found under bath tubs, under toilets, under sinks, in wall voids, in attics, under carpets, and around window and door frames.
What do Odorous House Ants Eat?
The diet of an odorous house ant consists primarily of sweets and protein. Outdoors, they will feed mostly on honeydew (a sugary fluid excreted by aphids, scales, and a few other insects) and dead insects. Indoors, they may search out other food sources such as sugar, fruit juices, syrup, pastries, meats, and even insects. When these ants go out looking for food, they do so using foraging trails, which are often hidden from our view and can, in fact, even be underground. Generally, these foraging trails are around the edges of a structure and can span over 150 feet.
Image: Apex Beats
Are Odorous House Ants Dangerous?
Fortunately, unlike fire ants or carpenter ants, odorous house ants aren’t a particularly dangerous or destructive type of ant. These pests are primarily a concern for 3 reasons. First, they can get into human and pet food and thus contaminate these products, leading to food and monetary waste. Second, if not correctly managed, they can create supercolonies and lead to a long-term formidable pest issue. Third, when disturbed, these ants can bite.
How do you Prevent Odorous House Ants?
Perhaps the most important part of prevention in the case of odorous house ants actually relates to how you handle the ants if you do come across them in or around your home. With these ants it’s particularly important that you call The Bug Dude at 800-310-BUGS (2847) and have an expert technician out to identify the ants and put together a treatment plan, rather than attempting to treat for the ants yourself. Because of the unique attributes of this kind of ant (as we discussed earlier), if you disturb their colonies or foraging trails without using the correct kind of treatment plan, you can simply cause the ants to move a little, meaning you will still have an ant infestation, but now you have to find it all over again, and in the meantime they will be growing in number. So in this case, you are preventing an ongoing or intensifying infestation by having The Bug Dude treat the existing issue.
But what if you haven’t encountered any ants yet? Here are a few tips to help keep odorous house ants away from your home:
Maintain a regular pest control service with The Bug Dude to not only combat any ant issues that arise, but to keep out other insects, which could become food for the odorous house ants
Fix any leaks in and around your home
Reduce areas of excess moisture inside your home
Keep your yard free from debris and minimize yard decor that directly touches the soil
Trim shrubs and trees away from your home
Seal exterior cracks and holes, especially around the foundation, windows, and doors
If you notice aphids or scales on your yard plants, get them treated
Keep landscape mulch away from the foundation of your home
Keep food (including pet food) well covered and appropriately stored
Don’t leave pet food out past when pets are eating
Immediately clean up food spills and debris
How do you Eliminate Odorous House Ants?
At the first sign of an odorous house ant infestation, call The Bug Dude at 817-354-5350 to have an expert technician evaluate the problem. Our technicians will assess the issue and put together a strategy to get you back to having an ant-free home in no time. And remember, while it might be tempting to try to take care of the ants yourself, when it comes to DIY ant pest control, if you use the wrong product, or even the right product but in the wrong places, you can quickly take a small problem and make it a giant headache.
This Mother’s Day, don’t let ants turn the day from resplendent to repulsive. At the first sign of these pests, call The Bug Dude and let us help you make sure that your mom is surrounded only by the beautiful scents of flowers, candles, or perfume, and not by the stench of odorous house ants.
Further Reading:
“Odorous House Ants (Tapinoma sessile)” – Ryan Davis, Arthropod Diagnostician, and Austin Taylor, Entomology Assistant – Utah State University Extension and Utah Plant Pest Diagnostic Laboratory
“Odorous House Ants” – PJ Liesch, Diagnostic Lab and Devon Pierret, UW-Madison Entomology – Wisconsin Horticulture, Division of Extension, University of Wisconsin-Madison
Author Bio: Alissa Breach has been gaining knowledge and experience around pest control concerns over the last 13 years while working for Mid-Cities Pest Control. She has a creative writing BA from UW-Madison and is always pursuing new and interesting writing projects.
It’s spring again in North Texas, and that means it’s termite season. As the temperatures settle into the 70s, and the humidity rises, the time is right for termites to appear. And not just appear, these destructive pests can emerge in the thousands, taking unsuspecting homeowners by surprise. Finding a termite infestation in your home is always unpleasant, but discovering it only after it’s been there for years is downright gut-wrenching, not to mention potentially devastating on your finances. Did you know termites cause roughly 5 billion dollars in damage annually?! As with so many things, early detection can mean the difference between a relatively simple fix and a massive undertaking. So how do you discover a termite infestation before it’s too late? Keep reading to find out!
#10 Nearby Homes Being Treated for Termites:
This one hits number 10 on the list for a reason; it’s hardly a guarantee that your house has a termite issue. However, since these pests don’t generally travel very far, if your neighbor’s house has active termites looking to expand their territory, it’s definitely possible they will find your home to be the best new buffet in town. So if you know that your neighbor is contending with a current infestation, it’s worth putting in some time and effort to look for any of the other 9 signs on this list, and then call The Bug Dude if you come across any of them.
#9 Outdoor Issues:
Termites don’t just live inside homes; they love to infest unhealthy or dead trees, wood piles, gazebos, and just about any untreated wood you could have in your yard. Not only can they exacerbate an issue in an already unhealthy tree, potentially killing it, the damaged/dead tree can pose a safety hazard to your family and house if it subsequently falls. In addition, having termites in your yard means they could already be on the way to your home as they look to expand their colony.
#8 Bulging Walls:
If your interior walls appear to be bulging, this is generally a sign of either a significant termite infestation or of moisture build-up. If you notice uneven or bubbling paint on your walls, the issue is more likely moisture, but that doesn’t mean you’re out of the wood; this excess moisture is not only structurally an issue in its own right, it makes your home more susceptible to wood-destroying pests like termites and carpenter ants.
#7 Sounds in your Walls:
Though a termite infestation might generally be viewed as a silent threat to your home and your wallet, they actually can sometimes be heard making distinct noises. So what does a termite sound like? No, you won’t hear them chewing away, but you could hear a quiet clicking or rustling noise inside the wood of your home. These noises are actually the sounds of soldier termites banging their heads on tunnel walls as a warning to other termites that there is a threat nearby.
In addition, if you notice that a previously solid piece of wood suddenly sounds hollow if you tap on it, that is a definite sign that a wood-destroying insect could be causing some serious damage.
#6 Termite Workers:
Worker termites are the ones directly responsible for the damage caused to your home. They are approximately 1/8” long, are a translucent cream color, and can be (mistakenly) called “white ants” due to a general similarity in appearance to the common ant. You are unlikely to just happen upon a worker termite wandering around your home. However, if you are doing any sort of home renovation and see “white ants” inside your walls, call The Bug Dude immediately at 800-310-BUGS (2847) to have a technician evaluate the level of infestation and put together the best treatment plan for your needs.
In addition, if you’re doing any work in your yard or garage and uncover “white ants,” know that these are termites and you need to call The Bug Dude to evaluate the issue.
#5 Wood Damage:
Often wood damage caused by termites will be discovered during home renovations. You pull off a baseboard, tear down some drywall, and suddenly you discover that the wood beams of your home have a sort of honeycomb damage pattern. If, however, you notice this type of damage on exposed wood, it likely means that the infestation is particularly bad, as termites tend to destroy wood from the inside out. Though the honeycomb-like damage is a sure sign of termite activity, if you notice any unexplained wood damage to your home, it’s worth calling on The Bug Dude to check for wood-destroying pests before they cause expensive damage to your house.
Also, keep an eye out for tiny holes in hardwood, called kick-out holes. These holes are made by drywood termites as a sort of excrement chute where they kick the frass (see #4 below) out from inside their tunnels.
#4 Frass:
Frass is a term for drywood termite poop, though it can also be used as a term for the piles of wood shavings and excrement expelled by carpenter ants while they excavate a wood source for their nests. Either way, frass is essentially a pile of what looks like sawdust or pepper, and these piles are generally found around baseboards and windowsills. Though this is an extremely noticeable sign of an infestation, in North Texas it will more often be a sign of a carpenter ant problem rather than a termite problem, as we tend to have more subterranean termites than drywood termites. Nonetheless, if you see piles of frass in your house, contact The Bug Dude immediately at 817-354-5350 to take care of the wood-destroying pest that’s invading your home.
#3 Mud Tubes:
Mud tubes are created by subterranean termites as a sort of protected highway to travel between their living spaces in the soil and their food sources (wood) in your home. These tunnels are primarily constructed of mud and are quite firm. They can range in color and size and will blend easily with the soil, concrete and brick that they are usually built on. Generally, these tubes will be built along a home’s foundation, basement walls, piers, expansion joints, near plumbing fixtures, by windowsills, and under porches. Though these tubes are difficult to spot, if you notice one, they are a sure sign that termites are either currently making your house part of their diet, or they are seriously considering doing so in the immediate future.
#2 Discarded Wings:
Most commonly found on windowsills in the spring, if you see a pile of 1” or smaller, oblong, clear or white wings, that is a very good sign you have a termite infestation. These are the wings of termite swarmers (see #1 in this list), and the fact that you see the wings but the not the termites means that they have likely finished their flight needs and are working on taking residence in your home.
#1 Swarmers:
Termite swarmers are the most easily noticed sign of an infestation. Unfortunately, they are also a sign of a well-established termite colony. Swarmers are winged termites whose mission is to reproduce and create a new colony. Each spring, when the temperature and humidity are right, they will leave their current colony in large numbers and take flight to find a new home. They are approximately 3/8” long, and have a black body with long clear or white wings. Generally, you will notice them inside your house along your windowsills (as they are attracted to light), or outside. Sometimes, however, you can find yourself in the midst of the swarm itself, in which case you will definitely notice the thousands of winged pests flying around the room. If you notice termite swarmers in or around your house, immediately call The Bug Dude at 817-354-5350 to have an expert technician evaluate the infestation and create a treatment plan. Finding swarmers in your home means you have a termite infestation and damage already in your home; the sooner you get it treated, the less you will have to spend on costly repairs.
Now that you know the top 10 warning signs of a termite infestation, what do you do if you think you’ve encountered one (or more) of these signs? Simple. Call The Bug Dude at 800-310-BUGS (2847) and have one of our expert technicians out to evaluate the situation. Whether the issue turns out to be termites, carpenter ants, or one of the many other pests that can cause you household nightmares, we can help eliminate the infestation before it causes a even bigger dent in your wallet.
Author Bio: Alissa Breach has been gaining knowledge and experience around pest control concerns over the last 13 years while working for Mid-Cities Pest Control. She has a creative writing BA from UW-Madison and is always pursuing new and interesting writing projects.